Quick Start Guide

for Professionals

To use LibreView you will need:

A computer with a compatible Windows or Mac operating system
The corresponding data cable for the device, if applicable
A compatible glucose monitoring device

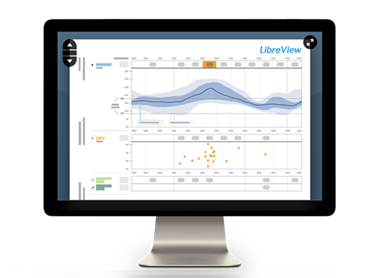
Welcome to LibreView - the all-in-one, web- based data management platform for the FreeStyle Libre Portfolio and compatible FreeStyle blood glucose monitoring systems*. Invite your patients to upload their glucose data into your LibreView account remotely and securely. Because LibreView is a web-based platform, you’ll be able to access patient glucose information from anywhere with an internet connection, even outside the office. LibreView supports glucose monitoring devices within the FreeStyle Libre Portfolio and FreeStyle blood glucose monitoring systems to create standardized, easy-to-read reports.

*Not all devices, mobile apps, and reports are available in all regions. Refer to the Compatible Devices article on the LibreView Support site for a list of supported devices. Units of measurement are for purposes of illustration and will be available as applicable per region. Mac computers can only support uploads from compatible devices within the FreeStyle Libre Portfolio.

DOC43868 Rev. R

Intended Use

LibreView is intended for use by patients, caregivers and healthcare professionals to assist people with diabetes and their healthcare professionals in the review, analysis and evaluation of historical glucose device data to support effective diabetes management.

In addition:

LibreView is a secondary viewer and is not intended to provide treatment decisions or to be used as a substitute for professional healthcare advice.

LibreView is not intended to be used for immediate clinical decision making, and is not intended to replace self-monitoring practices as advised by a physician.

Home users should consult a healthcare professional before making any medical interpretation and therapy adjustments from the information in the software.

Healthcare professionals should use information in the software in conjunction with other clinical information available to them.
Minimum System Requirements

LibreView can be used just to view data, or to also upload data. The minimum system configuration required to use LibreView as a data viewer is:

Windows 8.1 or Windows 10 Anniversary update (and higher)

  • Display resolution of 1024 x 768 pixels or greater.

  • The latest version of Chrome, Firefox or Edge

  • 1 Ghz processor (dual/multi-core recommended)

  • 2 GB RAM

  • Internet connection with 0.5 Mbps download speed

  • We recommend using the most up-to-date version of your browser when using LibreView.

Mac OS X Yosemite (10.10) or higher

  • Display resolution of 1024 x 768 pixels or greater

  • The latest version of Safari (Mac OS X Yosemite 10.10 or higher) or Google Chrome

  • 1 Ghz processor (dual/multi-core recommended)

  • 2 GB RAM

  • Internet connection with 0.5 Mbps download speed


Uploading data from a compatible reader within the FreeStyle Libre Portfolio or FreeStyle brand blood glucose meter into LibreView requires the installation of the Device Drivers File. The installation requires the following additional system specifications:

Windows LDD 3.2.0 and higher

  • Windows 8.1 or Windows 10 April 2018 update (and higher)

  • Will install if not present .Net Framework 4.7.2 and Microsoft Visual C++ 2017 Redistributable (x86)

  • 8 GB+ RAM and 200 MB free disk space

  • Internet connection with 1 Mbps upload speed

  • Local Administrator account

Mac LDD 1.2.0 and higher

  • Mac OS X Yosemite (10.10) or higher

  • 8 GB+ RAM and 200 MB free disk space

  • Internet connection with 1 Mbps upload speed

  • Local Administrator account

Creating a LibreView Account

You can create a professional account from an email invitation or directly on the LibreView website.

  1. Go to www.libreview.com and click Sign Up

  2. Select LibreView Professional Account

  3. Select your country / region of residence

  4. Agree to the Terms of Use

  5. Agree to the Privacy Notice

  6. Fill out your information

  7. Go to your email inbox, find the verification email from LibreView and click on the Verify Email button

  8. If enabled for you, complete 2-factor authentication, then click the Verify and Log In button.

Your email address will be your username.

You can use the same email address to log in to multiple practices.

Setting Up Your Practice

When you first sign up for LibreView, you are creating a private account. To access more advanced LibreView features, you will need to create or connect to a LibreView Practice. This will allow you to add Care Team members, securely share patient information with your staff, and invite patients to upload remotely.

  1. When creating a Practice, you will become the default Practice Administrator. Review the information about this and click Continue.

  2. Enter the information about your Practice including name, address and phone number. It is important to ensure this information is correct since patients will use it to identify your Practice when you invite them to share remotely.

  3. Click Create Practice to finish setting up your Practice.

Note: When setting up a new Practice, you can customize your Practice ID to make it easier for patients to connect to your account.

Invite and Manage Your Care Team

You can include other members of your team in your LibreView Practice. Care Team members in your LibreView Practice will have access to all the patient data in that Practice.

If you are a Practice Administrator, you can edit Practice Info such as the Practice name and address, or customize your unique Practice ID. The Practice ID is how patients can connect their LibreView account to your Practice.

  1. Go to Settings Menu, click on My Practices, and select your practice name.

  2. Select Care Team

  3. Add the user's name and email address, decide if the user should have Admin privileges, and click Save.

  4. The invitee will receive an email invitation to join your LibreView Practice. If they already have a LibreView account, they can simply sign in and accept the invitation to your Practice.

  5. If you are a Practice Administrator, you can remove Care Team members from your Practice

Installing Device Drivers

To upload glucose data into LibreView from a compatible reader within the FreeStyle Libre Portfolio or FreeStyle brand blood glucose meter, you must first complete the one-time download and installation of a device drivers file. The device drivers file makes sure that LibreView that recognizes the glucose monitoring device when it is plugged in to the computer. Make sure that you are using the most up-to-date version of your internet browser before starting the download.

  1. Click the Create 1-Time Report button

  2. In the window that appears, click on the Download button specific to your computer's operating system

  3. Wait for the file to download onto your computer

  4. Open the downloaded file by clicking on it and allowing it to run

  5. Follow the prompts to complete the installation

Note: You may need your IT Administrator to grant permission for the download and installation.

Links to the latest LibreView Device Drivers are also available on the LibreView Support website. Search for the "Install LibreView Device Drivers" topic and follow the instructions to download and install the drivers.

Best Practices

  • Make sure you are logged in as the Local Administrator or have your administrator's username and password available when you are installing the device drivers.

  • Have a compatible glucose device on hand to test the device drivers once they are installed.

  • If you are part of a practice or hospital system, you may need to contact your IT team for assistance.

Uploading from Apps

LibreView Device Drivers are not required to upload data from FreeStyle LibreLink or other compatible mobile apps within the FreeStyle Libre Portfolio into LibreView. Data from a compatible mobile app can automatically upload to LibreView if there is an internet connection.

Uploading a USB Device

Once the device drivers are downloaded and installed, you can plug in a compatible reader within the FreeStyle Libre Portfolio or FreeStyle brand blood glucose meter using the corresponding cable and start uploading data.

Go to the Device Upload page and choose the appropriate option:

For a one-time report:

  1. Select Create 1-Time Report to create a report that is accessible in LibreView for 24 hours, contains no patient-identifying information, and is not saved in the LibreView database.

  2. Once the data is uploaded, the reports will automatically open

For a saved report:

  1. Select Create Report Linked to Patient to save the report to a patient's profile

  2. If this is the first time you are uploading this device, search for an existing patient or create a new patient. Once you associate a device to a patient, all data from that device will be automatically linked to that patient.

  3. Once the data is uploaded, the patient's reports will automatically open.

  4. Once the data is associated with a patient, it can be viewed anytime from the patient's Profile by going to Glucose History and clicking Glucose Reports.

Note: When you upload a device, you may need to allow your browser to access the Device Drivers file. Save time by ticking the box so your browser will remember your selection before selecting “Allow” or “Launch application”.

Viewing Reports

  1. In a patient's profile under Glucose History, click the Glucose Reports button to see their data.

  2. Use the menu to navigate between the different available reports

You will see a different set of reports depending on the primary device selected:

  • If a compatible FreeStyle brand blood glucose meter is selected, you will see the Glucose Only reports: Snapshot,2 Daily Log, Modal Day

  • If the FreeStyle InsuLinx meter is selected, you will see the FreeStyle InsuLinx reports: Snapshot, Daily Log, Mealtime Patterns, Modal Day, Weekly Summary, Meter Details.

  • If a compatible reader or app within the FreeStyle Libre Portfolio is selected, you will see the FreeStyle Libre reports: Snapshot, AGP, Glucose Pattern Insights, Daily Patterns, Daily Log, Weekly Summary, Monthly Summary, Mealtime Patterns, Device Details

Note: Not all devices, mobile apps, or reports are available in all regions.

See the Report Overviews at pro.libreview.io for more information on specific reports.

Refer to the Compatible Devices article on the LibreView Support site for a list of supported devices.

Understanding Reports

Use the report labels and legends to understand the reports. LibreView provides a standard set of information and graphs relating to diabetes management and is only one part of understanding glucose patterns. Additional Information is provided below:

  • Glucose Management Indicator (GMI) uses average Sensor glucose data. GMI can provide an indication of the current state of a person's glucose management when used in conjunction with the entire glucose management program. Laboratory A1C may be different than GMI, and it is important to use the A1C in conjunction with GMI and other reported metrics in diabetes management.

  • In reports other than those with specific fixed standards, the glucose values are labelled as high when higher than 250 mg/dL (13.9 mmol/L) and low when lower than 70 mg/dL (3.9 mmol/L). The target range is set for 70-180 mg/dL (3.9-10.0 mmol/L).

  • The target glucose range is displayed on some glucose graphs and is used to calculate Time in Range.

  • Sensor data captured is the percentage of possible sensor data the device recorded from your sensor. To maximize this percentage your patient should wear the sensor for the entire duration and follow your sensor user manual instructions.

  • If a patient has gaps in data on their glucose monitoring device, this information will also be missing from LibreView reports. Sometimes information may be missing from reports if:

    • The time on the device was changed.

    • There was an excess of information to include in the report.

Changing Report Settings

While viewing reports you can change the settings you'd like to use. You can also set default preferences for the reports by patient or Care Team member.

When you're viewing reports, use the buttons on the bottom of the screen to adjust your settings.

  1. You can change the report dates by clicking on the blue button that says Change Report End Date. The default setting will show data from the date of the most recent upload. Click Save to generate reports using the new settings.

  2. You can select or unselect the devices that are used in the report set by clicking the blue button that says Data Sources. The default setting will show data from all devices that have data in the reporting period and can be included in the report set. Click Save to generate reports using the new settings.

  3. You can select the reports, adjust target ranges, change report parameters and more by clicking the blue Report Settings button. Click Save to generate reports using the new settings.

To set new default report preferences, go to your Settings menu.

  1. Click the Settings Menu icon and go to Report Preferences

  2. Set your target ranges, glucose thresholds, and report display order for all reports. Not all reports have adjustable target ranges.

  3. Deselect any reports you don't need to view

  4. Your settings will be saved as you make changes

Note: Click Restore Defaults to return to the default report settings.

Using Your Patient Dashboard

Use your Patient Dashboard to quickly view patient status and access their saved data.

Click the Patients icon to see the Dashboard. From the Patient Dashboard, click on a patient's name to access additional data associated with that patient.

Customize your Patient Dashboard to view additional information about the patients in your Practice. This allows you to view multiple patients at one time and identify patients that may be at-risk.

Views

Views are made up of groups of rows and columns. There are some pre-set Views - like Recent Uploads or Starred Patients.

You can edit the pre-set Views or create and save Custom Views with the parameters you find most important. Select the columns, filters, and settings for your Custom View and Save it so you can use it in the future.

Flags

Add or edit "flags" to highlight data that meets defined conditions like a specific average glucose value or a certain number of low glucose events

Starring a Patient

Click the "star" next to a patient's name on their patient page to add them to your Starred Patients - you can use this to view a subset of patients.

Export patients in your current view

Export the Patient Dashboard to a CSV file by clicking Export View in the bottom corner of the Dashboard.

Invite Patients to Upload Remotely

You can invite patients to create their own LibreView accounts and upload their devices from home. This may reduce uploading time in the office and provide earlier insight into their glucose data. Data uploaded by patients in your Practice is automatically added to their Profile and visible to all Care Team members in your Practice.

  1. From any screen, click the Invite Patient icon (shown above) at the top of the screen, next to the search bar.

  2. Enter the patient's name, birth date, email, and the Practice you'd like them to share with, then click Next.

  3. In the Patient Profile and Patient Dashboard you can view the status of your invitation.

Note: You can also invite an existing patient by going to their Profile and then the Invite Patient to Upload from Home tile. Select Invite Patient and an email address for the patient to receive the invitation.

Patient Page

In the Patient Profile section you will see information about the patient and any additional details associated with their account.

You can invite the patient to upload from home from this page, and you will see the list of your Practices that the patient is in.

Glucose History

In the Glucose History section you will see historical glucose information associated with that patient. Click Glucose Reports to view the Report Set for that patient.

Practices

In the Practices section you will see all Practices you are a part of that include this patient. From this section you can view Practice Records, Patient Notes, and edit Practice Settings.

Manage Account Information

Click the Settings Menu icon and select Account Settings to change your account information

  • In Account Settings, you can edit your own information such as name, email, password and other account information.

  • Preferences: Set your date format and language preferences

Helpful Resources

LibreView offers several resources to help you set up and use your LibreView account.

For Customer Support, contact the Abbott Diabetes Care Customer Support line for your country / region of residence


Argentina +0800-800-6334

Australia 1800 801 478

Austria 0800 222 775

Bahrain 800 19722

Belgium 0800 82106

Brazil 0800 703 0128

Canada 800-393-6645

Chile 800 802 226

Colombia 01800 5181895

Croatia 0800 989097

Czech Republic 800 143688

Denmark 39 77 01 90

Egypt 0800-006-0129

Finland +358 0800 772 355

France 0800 10 11 56

Germany +49 8006365500

Greece 211 198 5892 / 00800 123393

Hong Kong +852-5808-4196

Ireland +353 1800719995

India 1800 2100 998

Israel +972773645506

Italy +39 800693000

Japan 0120-37-8055

Jordan 64296013

Korea 080-014-5757

Kuwait 220 62972

Lebanon [01-426-801] [855-583-3354]

Luxembourg 800 72 106

Mexico 5555244175 / 8007112208

Netherlands 0800 242 4400

New Zealand 0800 106 100

Norway +47 80011706

Oman 800 74396

Philippines (02) 8 702 8577

Poland 800 388 700

Portugal 800860207

Qatar 00800 100869

Russia 8-800-100-88-07

Saudi Arabia 8008500863

Singapore 1800 272 2881

Slovakia 0800 189 564

Slovenia 0800 82028

South Africa 0800 222 688

Spain +34 900800726

Sweden 020-190 11 11

Switzerland 0800 102 102

Taiwan 0800 28 08 28

Turkey 0 850 2034323

United Arab Emirates 800 0178174

United Kingdom 08006123006

United States 855-450-3563

Regulatory Information

About

LibreView, version 3.18

UDI

(01) 00357599823009

(8012) 3.18

(11) 240618

Manufacture Date

2024-06-18

Reference

72156-01

Manufacturer

Abbott Diabetes Care Inc.
1360 South Loop Road
Alameda, CA 94502 USA

Labeling Symbols

Unique Device Identifier

Unique Device Identifier

Date of Manufacturer (YYYY-MM-DD)

Date of Manufacturer (YYYY-MM-DD)

Catalog Number

Catalog Number

Consult Instruction for Use

Consult Instruction for Use

Manufacturer

Manufacturer

CE Mark

CE Mark

Authorized Representative in the European Community

Authorized Representative in the European Community

Medical Device

Medical Device

Importer

Importer

Authorized Representative in Switzerland

Authorized Representative in Switzerland

UKCA Symbol

UKCA Marking